Showing posts with label New Facebook. Show all posts
Facebook is the largest social networking site with an excellent choices to build pages, teams etc for each individual. Utilizing the Facebook you could develop a web page as well as enhance it to earn your close friends to view the web page. In situation if you are fed with with those pages you could even erase a Facebook page with no concern. Numerous of the users develops heck great deal of web pages and also when they are vexed up they aims to erase Facebook web page.

Delete my facebook web page has came to be a basic question for the facebook individuals. Several of individuals doesn't recognize how to remove a web page on facebook and they keep browsing and make their time to be shed. We are supplying the post on how do you erase a facebook web page completely as well as makes the page not to appear any type of where in the facebook.

Delete Facebook Page

In order to make a Facebook delete web page you should be a admin of the page. If you are not an admin to the page then certainly you do not have any right to delete a web page or make any type of adjustments to the web page. To delete an fb page you could make use of some methods inspect the short article totally and also erase Facebook pages.

See: How to Hide Who You Follow on Facebook

How To Delete The Facebook Page
Right here the the methods to delete a Facebook web page entirely, however remember one point if you remove a web page from Facebook account, you could not restore it again. So check two times prior to erasing a page in Facebook. You could utilize the below techniques to erase a page on Facebook.

1. Erase Facebook web page Making use of Internet browser.
2. Remove Facebook web page Utilizing Mobile.


How you can Delete a Web page on Facebook Utilizing Web browser

Delete Facebook Page


  • 1. Initially open your internet browser and visit the facebook home web page. Login to your fb account with the credentials.
  • 2. Currently click on the settings which is at the leading right. You will see all the groups as well as pages in your account. Click on Manage Pages.
  • 3. You will see all the web pages in your account. Select a web page you intend to erase and also click on that page. You will certainly currently see the page. Most likely to settings in page.
  • 4. Now you will certainly see like this, all the settings like General, Messaging, Edit page and so on. Click the general settings.
  • 5. You can see faster ways, web page exposure etc. Scroll down the page as well as you will certainly see the remove page choice. Click eliminate page.
  • 6. It will request the confirmation to erase a page. Currently click Erase page.

Facebook Remove Web page Using Mobile

Delete Facebook Page
SeeHow can I see who follows me on Facebook
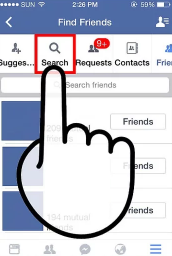
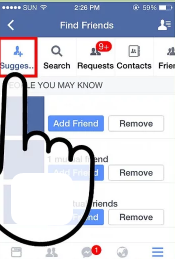
Several of the people makes use of facebook in mobile instead of in systems. So if you wish to delete a facebook page you can also your mobile also. Below we are demonstrating how do you delete a facebook page from your mobile.

  • 1. First login to your mobile fb account with initial id and password. Currently you will certainly see setups alternatives in leading right edge.
  • 2. You will see all the web pages. Click on the web page you want to erase. You will visit the page. Now go to the page setups by clicking on top icon.
  • 3. All the settings like create occasion, handle advertisements will be presented. Click on the edit setups from there.
  • 4. Settings will be presented. Most likely to general settings.
  • 5. You will see the pin page options. Scroll down and see the remove page. Click the Erase your web page choice.6
  • 6. Currently facebook will certainly ask for the verification, you have to verify it by clicking on the delete choice.
  • 7. It will reveal a message like in below photo, click on delete page alternative.
  • 8. Thats it your page will be deleted now.

You could remove page from your mobile easily. Removing a web page from mobile does not make any kind of difficulty and also actually you could remove any type of number of pages form your smart device.
Facebook has revealed brand-new personal privacy settings that give customers some extra control over exactly what information they share, while eliminating the capability to conceal a couple of items of info from the general public.
Hide Friends List On Facebook

Hide Friends List On FacebookOne certain item of openly readily available info-- individuals' buddies checklists-- caused a little an uproar from a number of fields, consisting of business individuals that don't necessarily intend to reveal their professional networks to the general public and also their competitors. It is also a problem to some moms and dads who could not want their children-- or a list of their youngsters' buddies-- to be commonly offered.

See: Facebook Logout My Account 2017

Facebook swiftly backtracked. A day later, the firm introduced on its blog that users could now uncheck the "Show my friends on my profile" alternative in the Pals box on their account to ensure that your buddy listing will not appear on your publicly readable account.

Unfortunately, they weren't really clear on exactly how you make the modification. You will not find this checkbox in your Facebook privacy setups. Instead you need to follow these actions:

1. Click Account on the blue bar a the top of the screen:
Hide Friends List On Facebook

2. Scroll to the beginning of your Friends list and also click the pencil to the right of the word Friends:
Hide Friends List On Facebook


3. Uncheck the box that states "Show Friend list to everyone":
Hide Friends List On Facebook

You can't conceal your buddies from your buddies and applications. But unchecking that box will conceal your close friends checklist when a non-Facebook close friend sights your public account, yet it will not hide your Facebook close friends checklist from your friends when they consider your profile. Also, this details will be readily available to applications and application programmers.

See: Create New Facebook Account 2017
Furthermore, this procedure does not conceal various other openly offered details including your name, account picture, sex, current city, networks you belong to, and also pages you're a follower of.
view My Account ... on the upper ideal section of that page.


A “poke” is basically someone trying to get your attention It’s one of the meaningless features that are used just to annoy someone. Facebook poke feature was a fun one until users got worried of what it really meant.The confusion led to the point that many users abandoned using it. I guess that's the reason Facebook is burying this feature under facebook.com/pokes. Initially, you won't beg to see this poking feature as it is embedded boldly close to each users profile.

See how to poke someone on Facebook here
If you want to poke everyone that has poked you, then you have to visit facebook.com/pokes on your web browser to poke them back.

You'll see the list of friends and Facebook users that have poked you.

Mind you, friends of friends can poke you. Hence, you shouldn't expect to see pokes from friends alone.

Please share this article with friends on Facebook so they can also find out where they can find their pokes and also to know what pokes means on Facebook.
CREATE MULTIPLE NEW FACEBOOK ACCOUNT |  CREATE NEW FACEBOOK ACCOUNT ON MOBILE - FACEBOOK SIGN UP: Getting started on How to Create a NEW Facebook Account, You'll need to follow this simple Facebook guidelines given in this article.


To create your new account on Facebook, an email address can be used, a phone number or the use of mobile applications. Creating an account using your phone number is supposedly easier than the email process considering you will have to activate or verify your account through your email. 

CREATE MULTIPLE NEW FACEBOOK ACCOUNT |  CREATE NEW FACEBOOK ACCOUNT ON MOBILE - FACEBOOK SIGN UP

Having a Facebook new account these days seems to be a paramount idea as with Facebook you can easily connect with friends and family.

How to poke somebody that poked you on Facebook: A “poke” is basically someone trying to get your attention It’s one of the meaningless features that are used just to annoy someone. Facebook poke feature was a fun one until users got worried of what it really meant. The confusion led to the point that many users abandoned using it. I guess that's the reason Facebook is burying this feature under facebook.com/pokes. Initially, you won't beg to see this poking feature as it is embedded boldly close to each users profile.

See how to poke someone on Facebook here
If you want to poke everyone that has poked you, then you have to visit facebook.com/pokes on your web browser to poke them back.

You'll see the list of friends and Facebook users that have poked you.

Mind you, friends of friends can poke you. Hence, you shouldn't expect to see pokes from friends alone.

Please share this article with friends on Facebook so they can also find out where they can find their pokes and also to know what pokes means on Facebook.

Source: Learn Facebook Account Basic Guides
When making use of Facebook, you are most likely to discover on celebrations that the number of buddies you have drops, for no apparent reason. Currently, there are different reasons that this actually occurs. First, a person could have in fact deactivated their account. This has nothing to do with you as well as it implies that they did not especially unfriend you or block you, but rather they just closed down their own account.


How To Tell If You Are Blocked On Facebook.

First, even if they do not show up on your close friends listing does not indicate that they have actually blocked you. You are still able to situate their account listing, also if you are not able to reach it. As a result of this, you need to key in their name right into the search bar. If absolutely nothing turns up, it implies there is a solid chance they just transformed off their account or had it shut off. If, nevertheless, they do turn up throughout the search, yet you are not able to really see their account, there is even more of a chance that they potentially blocked you.

Also, if you wish to check, click the last message you showed to them and also try to send out one more. If your message goes through as well as is not closed down promptly, it means their account is live as well as active. It additionally means you are not blocked. Nonetheless, if you not see them on your pals listing, then it is most likely that they simply unfriended you.

If neither of these are proving very handy, you need to log out of your account and execute a search for the person. When you are visited, if you have actually been obstructed, it is possible that their information is simply not most likely to show up in the search area in any way. However, if you are logged out and you search for the person, it ought to still appear. Due to this, after you have actually logged out, you simply need to key in their name right into the search bar.

If you are able to locate the individual when you are turned off however you are not able to find them when you are browsed through, it suggests they have their search establishing minimized permitting any person to look for them other than you especially. If this is the case, it suggests that they have, actually, obstructed you.

If nevertheless of this you are still confused as to the best ways to inform if a person obstructed you on Facebook, you could require to do a great old fashioned Internet search. Log out of your Facebook account, then head over to Google and key in the individual's name into the search bar. You have to ensure to utilize quote marks around the person's name when you do this. So, if you are seeking out "John Smith," you actually have to kind the quote marks around the name. You additionally have to ensure to make use of the Google online search engine. This sort of a search is not feasible with the other internet search engine out there. Now, after you have enter the person's name and also did the search, you should click on the internet search engine return.

From here, open up a separate window as well as log onto your Facebook account. Now, return to the internet search engine result and also click the result. Take note if it looks the same or different. Does the profile exist or has it all of a sudden vanished, as if it never left? If it went away, it indicates they have obstructed you. Nevertheless, if your good friend's name does not appear in the search result, it does not imply they have obstructed you, it just indicates Google most likely has not yet crawled their account page yet, which indicates it is not most likely to appear on internet search engine yet.


Just what to Do about It?Just how to tell if a person obstructed you on Facebook may be a vital skill to discover. Yet a lot of the time, actually, it isn't. Currently, you require to bear in mind that individuals are going to obstruct various other individuals. This is simply a matter of social media and also you must not let it bother you. As a matter of fact, attempt not to stress over it whatsoever. You are going to have your buddy numbers fluctuate frequently throughout your time on Facebook and also other social networks accounts. You need not obtain all worked up regarding it or anything, otherwise you are simply going to freak out each and every single time you see the number modification at all.

How to Hide A Friend On Facebook: If you are assuming, Is it feasible to conceal one friend from another close friend on Facebook? then solution is Yes! and also I'll reveal you How To Hide A Friend On Facebook and also I will certainly likewise show you ways to hide entire Facebook close friend list from your Facebook good friends or other individuals on Facebook. Simply comply with the steps provided below:


How To Hide A Friend On FacebookStep 1: Login to your Facebook account and click on your name on top to see your account.


Currently click friends tab at the top as well as afterwards faucet on the little pencil icon at the far appropriate. The major selection will certainly be Edit Privacy.

Keep in mind that you can similarly click on your name. Currently click the minimal down arrow sign that is positioned at the top right of the Friends section as well as click on Edit Privacy. The Friends area will reveal up along the left-hand side beneath Photos.

Action 2: Now you will certainly obtain Edit Personal privacy turn up. Just in advance as well as click on the little symbol to right side as well as you'll see a couple of options. On the off chance that you touch on Only Me, you'll be the main person that can see your close friend listing. This is somewhat engaging in light of that it indicates NO ONE will certainly have the capacity to see who your pals are.


On the off possibility that you have to merely keep ONE specific from seeing your whole listing of Facebook pals, you have to tap on Custom.


Below the Don't show to section, you will see these people or lists alternative with box. In that box, kind in the name of the person you desire to hide your pal checklist from.On the off possibility that you are trying to keep two of your friends from seeing each various other on your friend list, you'll should put in both of their names in the Don't show to box to make sure that neither can see your friend listing.

Thus you can hide one friend from one more on Facebook. If you have other ideas of doing very same you can show us using remark.

Facebook Logout My Account 2018

Web Explorer

1. Right-click in the tab toolbar at the top of Web Explorer and click "Menu Bar" to show the menu alternatives.

2. Click "Tools" then "Web Options."

3. Click "Erase" under Surfing History. Uncheck the very first box and after that inspect the rest. When you're done, click "Erase.".

4.. Click "Okay" to close your Web Choices and shut the web browser. When you resume it, your Facebook account will be logged out.


Logoff Facebook Account Upon FB Login Or Sign In


See: Create New Facebook Account 2017


Firefox.

1. Right-click in the toolbar location and click "Menu Bar" to show the menu alternatives.

2. Click "Tools" and "Clear Current History.".

3. Select "Whatever" from the drop-down menu. Make sure every box has a check mark and after that click "Clear Now.".


Google Chrome.

1. Click the three-bar icon in the toolbar then click "Settings.".

2. Scroll down and click "Program Advanced Settings." Click "Clear Surfing Data.".

3. Select "The Start of Time" from the drop-down menu. Guarantee each box has a check mark. Click "Clear Surfing Data.".

Facebook likewise provides remote user indication out, which allows you to sign out Facebook sessions on other computer systems from a various computer system. It can be discovered under Account Settings, Security Settings, and Active Sessions.

See: How to See Friendship on Facebook.


Facebook Messenger is a great app for people to communicate with friends and family who are on Facebook. Additionally, Messenger is emerging as a popular platform to interact with brands and services. For instance, you can now get your news within Messenger, or even hail an Uber or a Lyft car right from the app itself.
Facebook Messenger Download iOS
Facebook Messenger System Requirements
Make sure that you have meet the following available before you begin to download Facebook Messenger on your iPhone, iPad or iPod Touch:
  • 150MB available space
  • iOS 7.0 or later
  • WiFi or mobile web access
  • You have a Facebook account and have your username and password ready
  • Your Apple ID and password
How to Download the Facebook Messenger App
Before you begin, you will need to follow these easy steps to download Facebook Messenger to your iPhone or iPad:
  • Locate the App Store on your device
  • Tap on the search bar (the field located at the top), and type in "Facebook Messenger"
  • Tap on the "Get" button
  • You might be prompted to enter your Apple ID and password if you have not installed an app recently. The installation process will likely take about a minute or less depending on your internet connection and speed.
Facebook is one of the best social media. Here you can do many things like chat, post, comment or share something. In every activity, your name will also be added to your profile picture. The name carries your identity. Using the name, people can identify you with real life. Your name is the first thing what people will look for. So, the name should be perfect that your friends and other people can identify you at Facebook. Your name is also used when someone searches for your Facebook Account. So, your name is one of the vital elements of your Facebook account.
Before setting your name, you should know the Facebook standard guideline for choosing profile name. Here are some of the important point of that guide line. You can’t use any of those at your Facebook name.

  • You can’t use any symbol, number, unnatural capitalization, punctuation and repeating character.
  • Different language(letters).
  • Title or Surname. (Dr./Eng./Pr.)
  • General Words or phrases.
  • Any kind of word that is offensive or suggestive.

According to Facebook name guideline, they have stated that you can use the name that you used to know. Put your name that everyone uses to call you. You name could be anything strange or beautiful that doesn’t matter. Facebook will accept your name if don’t use the too strange name.

Change Your Name on Facebook Using Computer
There are several computing devices to browse the internet. Those are Desktop, Laptop, and other devices. However, if you are a computer device user and wants to change your Facebook username then use this method on your computer device.

Step 1: Firstly, open your web browser and go to https://www.Facebook.com/ and just log into your account
Step 2: Now you have to click on the upside-down arrow at the top-right side of your Facebook home screen.
Step 3: Then you will get this menu. Click on ‘Settings’.

Step 4: Now click on Name section.

Step 5: Enter your First, Middle, Last name.

Step 6: Click Review Changes button.

Step 7: Enter your current Facebook Password and click on Save Changes.


Change Your Name on Facebook Using Mobile Phone
Mobile devices are also one of the most popular smart devices to use Facebook. If you are a smart mobile device, you can also change your current Facebook name just using those simple steps one by one.

Step 1: Open your favorite internet browser. Then go to https://www.Facebook.com/ and log into your account using Facebook mobile login process.

Step 2: Click on the menu option at the top-right side of your screen.

Step 3: Go to the last section of the menu and click on Account Settings.

Step 4: Click General section.


Step 5: Tap on the Name option that is listed at first.

Step 6: Enter your First, Middle, Last name one by one. Then click on Review Changes button.


Step 7: Type your current Facebook account Password. Click Save Changes option and that all.


Want to find those you blocked on Facebook so you can unblock them? Once in a long while, it's okay to visit those people on your blocked list to make certain that you didn't actually blocked them in error.

Facebook is a social network that runs via the power of friendship - blocking so many people won't help you and not blocking annoying Facebook friends won't be an option either.

So how do you go about accessing those friends or Facebook users that you've blocked? We shall see how to locate users blocked by you on FB.


Your future spouse might be on your Facebook blocked list.
Sometimes go to your Facebook Blocked List just to see how your prisoners are doing.

CREATE FACEBOOK NEW ACCOUNT : FREE FACEBOOK | SIGN UP FACEBOOK NEW ACCOUNT NOW –  To get started on How to Create a NEW Facebook Account, YOU'LL need to follow this guidelines stated below.


CREATE FACEBOOK NEW ACCOUNT : FREE FACEBOOK | SIGN UP FACEBOOK NEW ACCOUNT NOW


To create a new account on Facebook, an email address can be used, a phone number or the use of mobile applications. Creating an account using your phone number is supposedly easier than the email process considering you will have to activate or verify your account through your email.

Having a Facebook new account these days seems to be a paramount idea as with Facebook you can easily connect with friends and family.

So, for all new or returning users of Facebook, you can create an account through the web or mobile app.

FACEBOOK NEW ACCOUNT THROUGH THE WEB:


  • Visit facebook.com
  • A signup form is made available. fill in all necessary information
  • Click on signup to continue
  • If registering with a mobile number, enter the verification code sent to your phone
  • Click on ok to continue
  • Add friends from the suggested list and you will be navigated to your home page

FACEBOOK NEW ACCOUNT THROUGH MOBILE APP

  • Download and install the app
  • Launch and head to the sign-up page
  • Tap on create new account
  • Enter all required information and click on sign-up
  • Enter the 5-digit code sent to your email address
  • Add a mobile number
  • Click on confirm and you will be navigated to your home page

Keywords:
  • create new account facebook
  • create new account facebook now
  • facebook create new account free
  • create facebook account new user
  • create facebook account gmail
  • welcome to facebook new account
  • create facebook account free
  • create facebook account with mobile number


When you are done with creating an account all that is left now is for you to set up your profile and edit your privacy settings to suit your personal need, then you can start posting or sharing for your friends to see and comment with you. Chat with new people, join groups, like pages, create and join events, etc.

You can login to Facebook through the web OR stay signed-in on the mobile app. To log in you will need your mobile number or email address and password. Once inserted, click on login to continue.
Getting to join the ever-growing Facebook world is not a tedious task at all. All it takes is a minimal time and it’s completely free.
Whenever we hear the term social media sites, normally words that collars psychological of topmost individuals is "Facebook'. It could be, since Facebook has been around for a whole lot longer than other prevailing social media sites systems.
Facebook has its own merit and imperfections. However, one of the most annoying component is the number of alerts that clutter the Facebook. Ways to clear notifications on Facebook is a question that has come to be a warm potato these days.

Erase Notifications On Facebook.Individual Notifications

This certain method is very straightforward and also you could exercise it as quickly as you see an alert from an app or a video game you intend to obtain rid of. Below is the gotten process for the exact same:

1. Click the "notifications" tab in the upper-left-hand edge of Facebook. Click the alert of the certain game or application you want to obstruct. Just hover over it and also a drop down box will certainly appear. Click that.


2. You will be provided a selection to either switch off alerts from that app/game, or keep them on. Just, click the turn off button.

3. A message will certainly stand out up that articulates that you will certainly no much longer get notices from that specific application or video game.


And also it is as simple as that to block those individual alerts that haunts you.


Exactly How to Clear Notifications on Facebook that are in mass numbers.Now, this approach permits you to remove an entire number of alerts at a few clicks. It not just saves time yet is also more convenient as compared to the previous one.

So, without including on better, let's take a look at ways to erase Facebook notices in mass numbers:

1. Click on the "Alerts" button near the bottom appropriate corner in Facebook and also then click "See All.

2. You will be taken to a page showing a whole variety of your current alerts.

3. Merely, recognize the application or video game notification you wish to obstruct, simply float over it as well as a fall arrow will certainly show up. Click on it, then click "Transform Off.".


However, be a little added cautious while exercising this option as you don't wish to transform off the important Feed remarks. Simply be little mindful and you ready to go.
Find How To Change Facebook Birthday. Discover all the actions you should make on computer systems, smart devices and also tablet computers right below. Excellent reading and excellent fun!

How To Change Facebook Birthday.If you wish to alter your birthday on Facebook utilizing your COMPUTER, indication in to your personal account (if you have actually not currently authorized in) and also click your photo on the leading right.

On the page that opens up, most likely to the Information tab (under the cover picture of your account), choose the Around Tab and also click the Edit your contact and also basic details that gets on the right, right listed below your current birthday established in your Facebook account.


At this moment, scroll to the web page you opened till you reach the Standard Info pane, area your mouse arrow on the Birth Date field and also click on the Edit item that appears on the right.


At this moment, utilize the drop-down food selections for day, month, and year to set your proper birthday celebration and use the thumbnails icons on the sides of these menus to pick that to show birth date on Facebook: close friends, all, just you or a choice of customized calls.

When you have actually completed filling in the kind, placed the check beside the Confirm to have xxxx years, click the Save Changes button and also the task is done. You could alter your birthday celebration to Facebook only for a restricted variety of times, so prior to confirming the adjustment see to it that the form areas are all compiled properly.

Next off, you can transform the personal privacy degree of your birth day (ie, the target market to display the info on Facebook), going back to your personal account by picking the Information tab and also clicking on the Edit your standard information very first get in touch with and afterwards on the Edit product next to the date area of birth.
Countless individuals are making use of Facebook worldwide but still you may discover few rare ones that still do not know about this social media sites system. However if you are here on this page after that probably you are most likely to break all policies currently and also are believing to leap to Facebook system with an attracting profile.

Creating Facebook Account

So, adhere to these guidelines to obtain begun with a brand-new Facebook account.

Facebook Create Facebook Account
Ways to Create a Facebook Account on COMPUTER:

Step 1: Subscribe:
The first action is to open up www.facebook.com on your web internet browser and afterwards struck Create account option. It will certainly ask for your basic info, easy include your real name in the space provided with 2 areas: Very first name and Surname. For the security reasons you may have to prove your identification so always favor to create Facebook account with genuine name only.

Creating Facebook Account
After that enter your exact and also functioning mobile number or individuals can also favor to upgrade their email ID. It will certainly work to obtain updates regarding their facebook account. Up date your wanted protected password, birthday celebration details as well as gender information. As soon as you enter this information, you will certainly obtain a confirmation code via SMS (if you have actually gone into Mobile Number) or a link in e-mail (if you have entered your e-mail ID). Verify your identity utilizing this code or email link as your account will certainly be produced only then verification.

Step 2: Establish up Personal Privacy Setups:When your Facebook account is validated you can relocate to the following step inside your freshly developed account. It is necessary to start with personal privacy settings initially and add controls concerning who can watch your profile or updates. To do this, relocate to settings alternative offered ahead bar below an arrow at ideal hand side portion of screen.


A brand-new settings window will certainly open and you will certainly locate numerous alternatives in a navigating pane located at left hand side. Select personal privacy settings from this long listing.


You will certainly locate different options for material audience: Public, Pals, Specific Friends and also Just Me, picked any of these based on your need. Note that privacy setups could be additionally readjusted at the time of new message updates.


Step 3: Total Profile Details:.Now it is time to upgrade your significant account details. This is fairly fascinating!

Post Account Picture:.The initial essential job is to publish your appropriate account image to earn your account well-known to your buddies. Facebook can instantly chop uploaded images to desired size so you need not to fret about its measurements. Simply select your most lovable photograph and also make it your profile picture. Based on current updates made to Facebook system, users could likewise utilize a 7 second video to earn their profile video clip. It can be included from Android or apple iphone.

Include Cover Image:Choose a beautiful album of yours to make an attracting Facebook banner. This selection could be also chopped or easily re-positioned using Facebook editing devices. Facebook also permit users to upgrade a GIF picture as Facebook Cover.

Finally you need to upgrade the 'About' area of your profile. Include your call details, gender, age, and also religion along with partnership standing as per your option. Update couple of attractive quotes to earn it a lot more intriguing.

Step 4: Find your Pals:In this last action you are currently all set to make links online. Facebook could aid you to obtain gotten in touch with your friends and loved ones. To do this, you require to look for your wanted accounts and afterwards send out close friend demands. Below are two techniques to send good friend requests:.

So ultimately, it is time to update an eye capturing standing for your pals on your new Facebook account.

Today I simply realized a brand-new button/menu entitled "Concern" on my Facebook (on the top of your Wall surface, where you can share your Standing, Image, Web Link, as well as Video Clip). Evidently this upgrade has actually been there for rather some time however I didn't notice it although it's in front of my eyes (this is called Residential Blindness)!

How To Make A Poll Question On Facebook.

1. Click the Inquiry link (where you usually post your status updates) to begin making a survey on Facebook.

2. Click on the "Include Poll" alternative to include a nice poll right into your concern.

3. ... come on, you can just do this by yourself, right?:-RRB-.

Evidently, this "Concern" function is not restricted to producing Polls and also solutions are not such as the replies that you've been doing so much on individuals's wall surfaces. To learn more, avoid to Facebook Questions official page.

Currently we can all have much more fun in creating our personal standing updates and have far better value articles on our company' Facebook follower page. It's also easier and also more effective to different inquiries from your blabbering condition updates! This resembles having Yahoo Responses integrated into Facebook. Me Like.

Now you can make a poll on the Facebook platform, certainly, the respondents are your pals as well. So, you can welcome your good friends to join your survey, and you'll obtain verified users.

Ways to produce a poll in Facebook:1. Login to your Facebook.

2. Most likely to Poll on Facebook.

3. Simply begin producing your very own survey, comply with every step till you publish that.

Do you have a Facebook and an Instagram account? Do you know it is possible to link both to each other? We'll be showing you how to link Facebook to Instagram.
LINK FACEBOOK TO INSTAGRAMTo link Facebook to Instagram, follow the steps outlined below:
  • Tap on the Instagram app to open it: If you aren't signed into your Instagram account on your device, you'll need to do so in order to access the Instagram settings. 
  • Tap on the Profile button: This is the person-shaped icon in the bottom right corner of your screen; tapping it will take you to your Instagram account. 
  • Tap on ⚙️ (iPhone) or [⋮] (Android): This is in the top-right of the profile page and will open the "Options" menu. On Android, this icon resembles a vertical stack of three dots. 
  • Tap on the "Linked Accounts" option: This is under the "Settings" subheading. 
  • Tap on the "Facebook" option: This will redirect you to a Facebook login page. 
  • Enter your Facebook email address and password: This will log you into your Facebook account from within Instagram. You may be asked if you would rather ''Log in with the Facebook app'' or ''Log in with phone and email''. If your choice is to log in with the app, then tap ''Open'' when you are prompted to open the Facebook app. 
  • Select who can view your Instagram posts on Facebook: Tap on the drop-down menu and select one of the following privacy options: Public, Friends, Friends except Acquaintances, Only me, Acquaintances to choose who can view your Instagram posts on Facebook. 
  • Tap on OK. If you are prompted to open Instagram, tap ''Open Instagram''. 

You can link your Instagram and Facebook accounts to share posts directly from Instagram to Facebook. Once you link accounts, you'll have the option to share a post to Facebook from the same screen where you add a caption.
Facebook is a substantial place, however you might be surprised about just how connected individuals are. When you're trying to track somebody down on Facebook, there are a variety of methods you can deal with it. From straightforward searches to scouring close friends listings, with a little dedication you can normally find who you're looking for.

Click the Buddies button in the leading bar of Facebook. You'll see a listing of any pending pal demands.

The advanced search methods in this area are only readily available with the Facebook site. To discover buddies using the Facebook mobile application, click on this link.


Click the "Locate Pals" web link at the top of the food selection. This will certainly open up a new web page with Facebook's friend-finding search devices.


Browse the "Individuals You Might Know" area. These are Facebook's suggested buddies based on mutual friends and also just how most likely you are to know each other. The checklist can obtain pretty long, so you could not be able to make it via the whole thing.


Locate the search sidebar. On the ideal side of the Locate Pals page you'll see a sidebar with numerous search areas. You might have to scroll up if you scrolled down with the recommended good friends. Every one of these fields will certainly help limit your search.

Use the areas in the search bar to produce a personalized search. You make use of any one field or integrate multiple ones to try to find the individual you are seeking. Each field that you fill out will filter outcomes, and individuals you are probably to understand will be noted on top of the outcomes checklist.

You don't should get in anything into the "Call" area. For example, you can just make use of the present city area to see every person in your community that has their place set as that community.

As you enter terms right into the areas, you might obtain ideas. Select these pointers for the very best outcomes, if they match just what you're looking for.

Find good friends from your e-mail calls. Package in the upper-right corner of the Locate Buddies page enables you to enter your email account info and have Facebook check for anybody on the checklist that is making use of Facebook.

Select your e-mail solution from the readily available choices. If you don't see yours, pick the generic e-mail symbol.

Enter your email login info. For most services, this is all you will have to do. For Gmail, you'll have to export your Gmail contacts and after that publish your contacts submit to Facebook.


Kind somebody's name into the Facebook Look field. The most basic way to search for somebody is to type their name into the search. You'll discover this a whole lot much easier if the person you are searching for has an unique name. Facebook will certainly attempt to put more useful matches at the top of the checklist. [2] This search area can be found at the top of the site, or on top of the Facebook app.


Enter somebody's email address or phone number to look for them. If you know someone's email address or phone number, you could enter it right into the Facebook Search area to see if it brings up the person's web page. They'll should have that call info established as "Public" in order for this search to work.


Kind "Individuals that like " to find individuals with similar rate of interests. If you want to discover some brand-new similar friends, use this search to locate people with shared rate of interests.

As an example, to discover fellow SpongeBob followers, kind "People who such as SpongeBob" into the Facebook Search field. The outcomes will certainly include everyone that has actually provided "SpongeBob Squarepants" as a passion. Individuals that you're presently close friends with will certainly be provided initially, complied with by individuals you share mutual friends with, adhered to by everybody else.

You could type "people that like what I such as" to see a list of suits based upon every one of your sort. You'll should click the "People" tab after making this search.


Attempt turning the individual's name into their profile URL. If you know the person's name but can't find them through a search, you can try thinking their account URL. Many individuals utilize their genuine names or e-mail user names as their account URL. Typical styles include:

www.facebook.com/firstname.lastname

www.facebook.com/firstnamelastname

www.facebook.com/emailname

Try adding numbers to the end of the address if the name is common.

Browse your pals' Buddies lists. This process is a little more laborious than others, however often simply checking out your close friend's friends can aid you locate who you're seeking.

Open your close friend's profile page and also tap or click the "Friends" switch. This will certainly display every one of that person's Facebook pals.

Browse through the list or make use of the Search area at the top of the buddies list to search for somebody particular.

You can switch filters along the first to see close friends in the same city, pals that mosted likely to the very same senior high school, and people you could understand.


Tap the Even more (☰) switch and then tap "Pals." This will open the Discover Friends section of the Facebook app with the "Friends" tab active.

The process for finding good friends is essentially the very same for both Android as well as iphone


Open up the new good friend Browse display. This screen will certainly enable you to look for people to include, which serves if you understand some of the person's information.

Tap the "Search" tab on top of the "Locate Buddies" display. You could need to scroll the tabs to the right to see it.


Search for a person to add. You could search for individuals utilizing their name, e-mail address, or telephone number. You can not do several innovative searches making use of the app. See the initial section of this write-up for information on using the Facebook website to find more individuals.


Have a look at your suggested buddies. The "Suggestions" tab of the Locate Pals screen will display your recommended good friends based off of mutual friends or various other lining up interests. The checklist can be fairly huge, and also you could continuously scroll down to fill even more outcomes.